In this tutorial, I'd like to explain how to use WonderBrush 2.0 to edit screenshots. I describe how to take a screenshot, make the background transparent and remove
unneeded content from the image.
 |
I'm a longtime Windows user in terms of editing my screenshots (Corel Photo Paint V5). For me it was usually too complicated on haiku to cut specific areas of a picture. For me, even today, file sizes are too big for images on Haiku. At this year at the BeGeistert in Hamburg I learned a lot about WonderBrush. |

To make a good screenshot, the background should be as simple as possible. Therefore, I simply created a directory on the desktop for this tutorial and called it "tutorial". Now I would like to take a screenshot of this folder with the folder menu open.
To do this, I press the "Print" button on the keyboard and create a screenshot with the system's own screenshot program Screenshot.
I have deliberately chosen this object because the Screenshot program will cut every currently active program window exactly if you have selected the appropriate option, but in this case more will be displayed because the menu is open.
Now we select in the /boot/home/ directory the created screenshot, press the right mouse button and select "open with: WonderBrush" in the context menu.
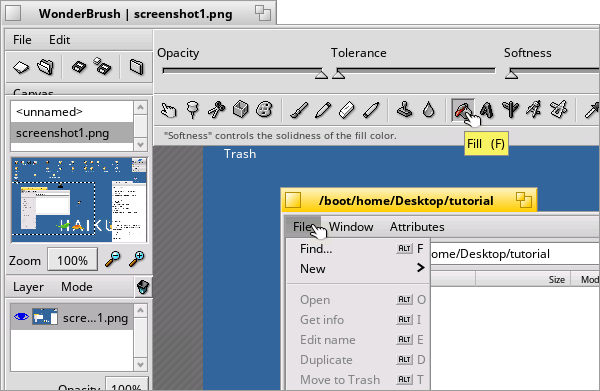
In WonderBrush we select the tool Fill...

...then we select a color in the color palette (this must be a color that is not included in the image)...

...and execute the Fill function on the image. Here we select the background, not the object.
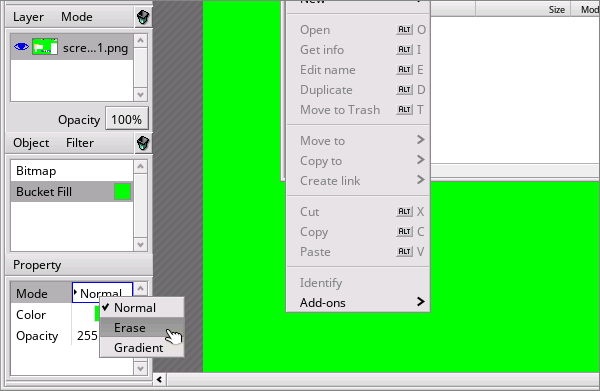
Then we go to the Property menu and change the Mode from Normal to Erase.
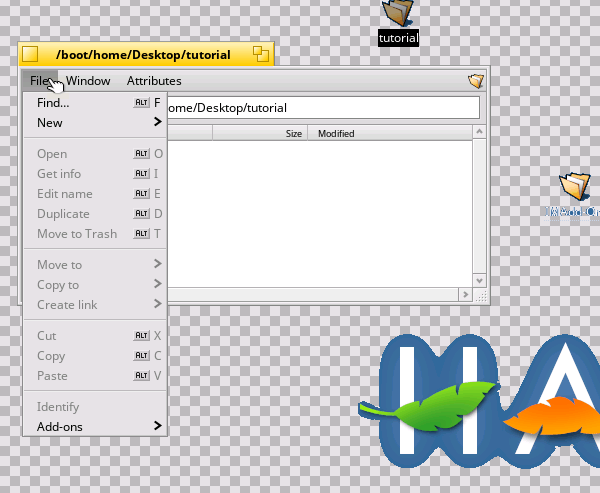
This has made the background of the picture, the color we used to color it, transparent.

Now we come to pruning the screenshot. For this we go to the tool Crop...
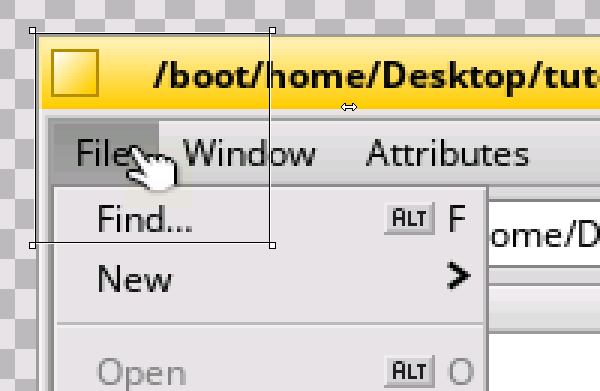
...we click on the image and move the displayed frame to the outer left corner of the window.
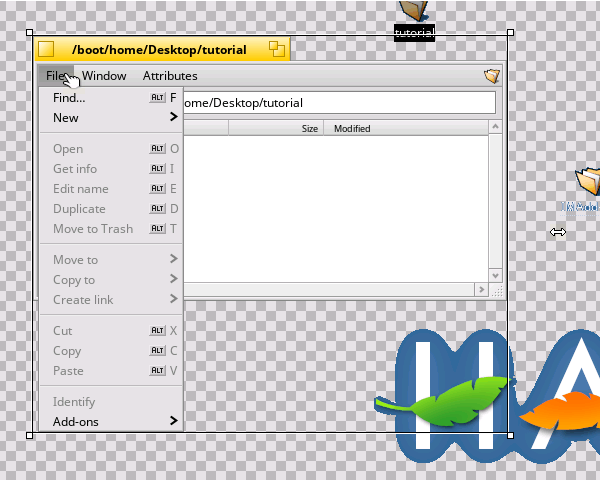
Then we use the mouse (holding down the left mouse button) to grab the bottom right corner of the frame and drag it to the bottom of the frame (here the bottom edge of the menu).
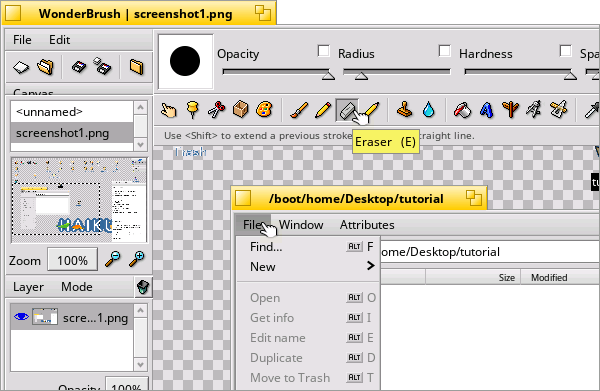
Then we select the tool Erase...

...and remove all unwanted image parts. To do this, move the eraser brush over the corresponding areas with the mouse.
Due to the fact that we have previously set the frame, only in the framed area a change is made.
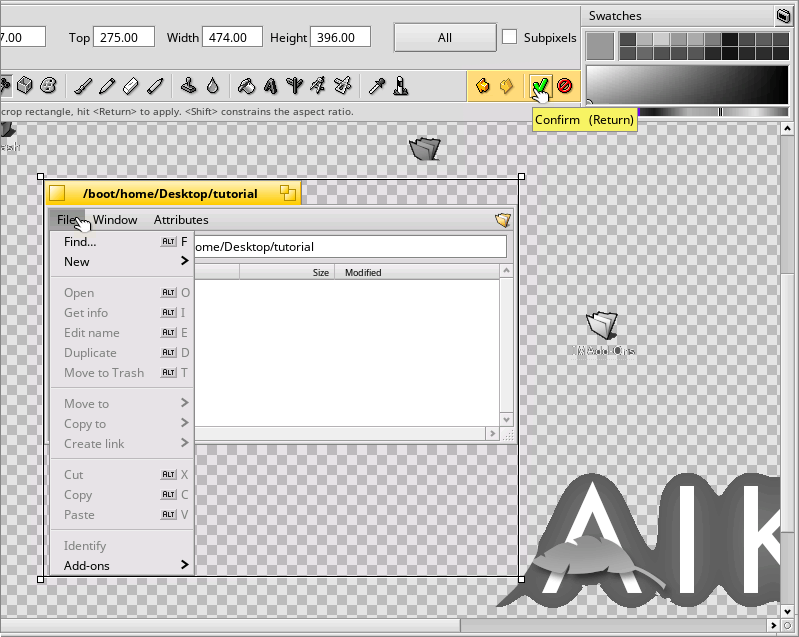
Then go to the toolbar and finish the process by selecting the Confirm button.

Now you can save the image as a WonderBrush project (Save As...) (includes all layers) and / or export the image in a desired image format.
Tutorial by Christian Albrecht (Lelldorin) December 2018
Made available by BeSly, the Haiku, BeOS and Zeta knowledge base.


